FREE ORGANIZER PATTERN WITH CRICUT
Whatever you're trying to organize whether it be your finances or stuff this free organizer pattern is perfect. Great for coupons and envelop system saving!
Supplies
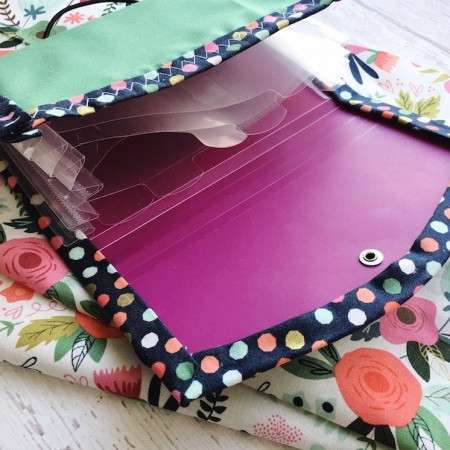
- Accordion Folder
- Fabric
- Tacky Glue
- Binder Clips
- iron-on vinyl
- Fabric Layout for Cricut
- Cricut Maker
Instructions
- Cut out cover fabric and binding. You can easily adjust my Cricut project dimensions to suit other sizes or just manually cut the correct size. You want a rectangle the same width as your organizer and the length should be the measurement of wraps from the inside panel around the bottom to the front flap. If you have a Cricut maker simply use my project and edit the dimensions of the main piece if needed. The binding should be plenty for most small size organizers.
- If using a Cricut Maker to cut out the pieces you'll want to make sure to use your rotary blade and fabric mat. I have the binding and main fabric as different colors so it will lead you through loading the fabric twice.
- Next cut out your iron on vinyl. You can download the "Better than I deserve" image and then resize it to however big you want it. I did mine 2 inches by 1.5 inches (remember that you can unlock the dimensions when resizing!). When you go to cut it you'll need to mirror the image. Place the iron-on vinyl plastic side down (vinyl sized up) on a strong mat. Weed the negative space out (I found my Cricut BrightPad to be super helpful especially with the glitter iron-on vinyl).
- With right sides together sew the short ends of the binding pieces together to create a long strip.
- Fold both edges towards the center of the binding to make something resembling double fold bias tape. I used my Cricut EasyPress since the huge surface area made it perfect for ironing the folds in place. Next fold the binding in half and iron. You've now made faux bias tape.
- Mark the position of the "button" on some these are on the flap and others they are on the underside. Sew a buttonhole right where the button should be.
- Slide out the elastic.
- Iron vinyl onto the fabric. You can use a household iron but I find the Cricut EasyPress does a better job.
- Measure the width of the organizer and sew that length x 2 of the binding folded sides together. Cut half of the sewn amount and set aside.
- Glue the base fabric to the organizer.
- Position the sewn side across the front of the organizer. Glue the binding to the organizer by folding it around all the edges. Glue the sewn strip of binding across the top and tuck under the side binding. Use binder clips to hold in place while the glue sets.
- Using an awl or embroidery scissors poke a hole where the elastic fits. Use a small bit of fray check or clear nail polish and then slide the elastic back into place.
Notes
I was able to save a ton of time by using my Cricut Maker and other Cricut Essentials to cut out all the fabric pieces and embellishments. This is a super simple project that's easy to adjust for any size accordion organizer.
Love this recipe?Follow @RaeGunRamblings or tag #RaeGunRamblings!