20 Minute Clear Vinyl Wet Bag
This speedy vinyl wet bag tutorial comes in two sizes clutch for splash proof small items and pool tote for all your wet gear once your done with the water.
Supplies
- Clear Vinyl
- Double Fold Bias Tape does not have to be true bias tape made on the bias you just want the double fold
- Snaps and Tools to Attach Snaps
Instructions
- Fold your vinyl in half to form your bag shape make one edge about 1/2-1 inch below the other edge.
- Trim the bias tape to a little more than the width of the top edge of your bag. If doing the bottom edge you will need two pieces this long. With the remainder you should have close to what you need to line the top edge and fold it over for a wrist loop trim it down if you want it smaller.
- It is easier to do both top edges first (on the clutch video I don’t do this). Start by tucking the edge under of your bias tape to hide the raw edge then sandwiching the vinyl in between the folds of the vinyl. On one edge you will finish by tucking the edge under and clipping. On the other you will have a long tail.
- Zig zag stitch the bias tape in place making sure to catch the vinyl in between. On the side with the tail once you get to the end of the vinyl just straight stitch the bias tape together along the bottom Edge.
- Next fold the tail over to form your wrist loop. Tuck the raw edge under and sew into place with an X or a few rows of back stitches.
- Fold your bag so that the edge with the wrist loop is 1/2-1 inch above the other top edge.
- If you are adding bias tape at the bottom edge you can cut it to make it lay more flat. Skip to step 8 if you are just using the folded edge. Attach the bias tape to the bottom edge just like you did to the top edge.
- Next attach the snaps. See the video for step by step instructions if you’re not sure how to do that.
- Next clip the sides in place.
- Fold the wrist loop edge over the other top edge and clip in place
- Sew the sides about 1/4 seam allowance and making sure to back stitch at both ends. At the top you should have both bias edges on top of each other.
- Next attach the snaps. See the video for step by step instructions of how to do that.
- Made these wet bags and not sure how I lived without them. Great 20 minute sewing project perfect for taking to the pool
Video
Notes
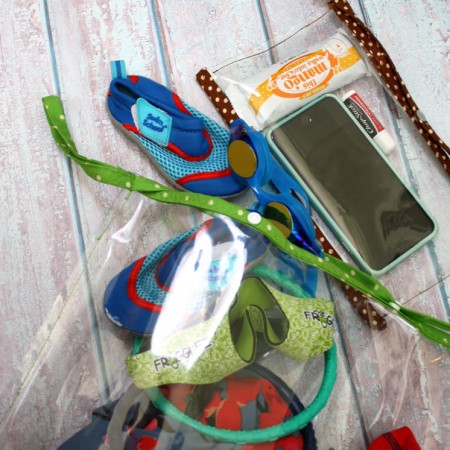
I like the large one for shoving all the wet stuff in as we’re leaving the pool. You know swimsuits, goggles, aqua socks, toys. All of that. And the little one is awesome for keeping my phone accessible but protected from splashes or drippy kids hanging around.
Clutch Size
10×13 Clear vinyl
1 yard bias tape
Wet Bag 15-18X60 Clear Vinyl
1.5-2 yard Bias Tape (depending if you want to do the bottom strip)
What to Do
1 yard bias tape
Wet Bag 15-18X60 Clear Vinyl
1.5-2 yard Bias Tape (depending if you want to do the bottom strip)
What to Do
Love this recipe?Follow @RaeGunRamblings or tag #RaeGunRamblings!