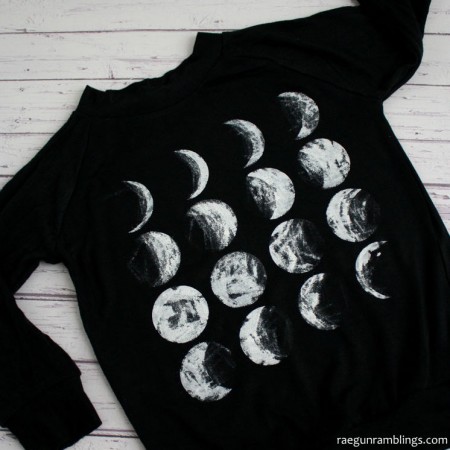
DIY Phases of the Moon Shirt
This DIY phases of the moon shirt tutorial is SO easy. Just 30 minutes any one can make themselves a him moon shirt
Supplies
- Shirt
- Fabric Paint
- Sponge Brush
- Circle Template I’ll tell you how to make one below or use my adult version here
- Freezer Paper
- Cutting Machine like a Cricut or Exacto Knife and a steady hand
Instructions
- First make your template. I used my Cricut Explore and the basic circle design was free so I just laid out a bunch of circles in the position that I wanted. You might not know this but in Design Studio (the Cricut program) you can highlight everything and select align and it will space things evenly for you. Even if you don’t have a Cricut you can do this manually by measuring and tracing circles and then cutting it with an exacto knife. But I adore my cutting machine and use it all the time and it does make this step way way faster. Cut your template out of Freezer Paper. If you’ve never done this before check out my Freezer Paper Stenciling tutorial. It has a lot of pictures and the directions are a little more flushed out.
- Now you should have a piece of freezer paper with circles evenly spaced out.
- With the SHINY side DOWN (touching your shirt) iron your template into place. Use a pressing motion (lift the iron and place it down and repeat) as opposed to a rubbing running motion with the iron. This way you won’t risk accidentally catching the edge of the iron in one of the circles.
- Insert another piece of freezer paper inside your shirt with the shinny side up. This is to prevent paint from seeping through to the back of your shirt.
- Once your template is secure, pour out some white fabric paint onto a paper plate (or something else disposable).
- Tap a SMALL amount of paint onto your brush and practice pressing the paint down. When you feel confident make sure you have my picture pulled up as a guide and press the paint onto the shirt. Again I find a pressing motion works better and is less likely to snag the template or get paint under the template.
- Once your last moon is painted allow it to dry for 10 minutes and then VERY CAREFULLY peel off the freezer paper. The paint will still be wet so make sure not to touch the painted portions of the freezer paper to the shirt. I like to hold the shirt down with one hand and pull with the other. If you are nervous you might want to have a friend hold the shirt while you pull.
- Leave the inner freezer paper and the shirt to dry for at least 12 hours before handling.
Love this recipe?Follow @RaeGunRamblings or tag #RaeGunRamblings!