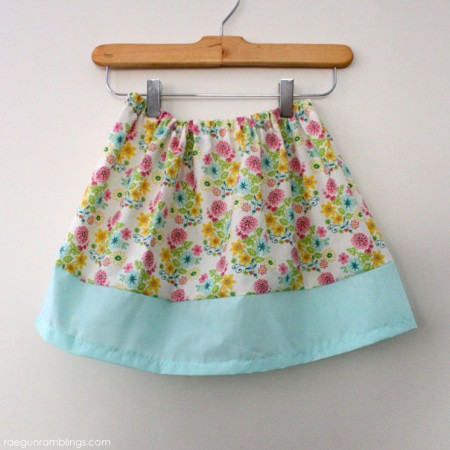
20 Minute Basic Band Skirt Tutorial
Want to teach someone how to sew or learn yourself? This 20 minute basic band skirt tutorial is the perfect easy sewing project. Great for newbies or gifts.
Supplies
- Main Fabric
- Band Fabric 5 x width of the fabric
- 1/2 inch elastic for waist
- Safety Pin
Instructions
- With right sides together (that is the pretty sides) align the main fabric and the band fabric and sew down the long edge using a 1/2 inch seam allowance (that means from the needle to the edge of the fabric it should be 1/2 there is probably a mark on your sewing machine).
- Finish the raw edges with a serger or a zig zag stitch (when I teach kids I do this step for them).
- Fold back the band. With right sides together match the short ends of the fabric together. Make sure your seam line is lined up. Pin in place or if you're confident you don't need to pin, beginners should pin though.
- With a 1/2 inch seam allowance sew down the short edges to make one big tube.
- Finish both edges with a serger or zig zag stitch (I do this step for the kids).
- Iron the edge of the band side under wrong side together 1/2 inch and sew down with a 1/4 seam allowance (usually lining the fold of the fabric with the edge of your presser foot).
- Iron the top edge of your skirt under wrong side together 1 inch. Sew down with a 3/4 inch seam allowance making sure to leave about a 1-2 inch hole to insert the elastic.
- String your safety pin on to one end of your elastic. Thread it through your waist band. Make sure it did not get twisted along the way. (I usually have to finish this for the kids but they can start it and given enough time they can probably do the whole thing but it's a lot of work for little fingers)
- Over lap the ends of your elastic one on top of each other about 1/2 inch and sew back and forth 3-4 times.
- Sew the hole closed in your elastic band by sewing over where your stitches left off over the space of the while and where your stitches start again.
Notes
DETERMINING THE SIZE AND FABRIC YOU NEED
For these skirts I like to use quilting cotton for beginners but if you’re comfortable with sewing it will work with any fabric you want. Whether I make this skirt for an adult or a child I always use the full width of the fabric for quilting cotton usually 44 inches. If the width of your fabric is longer there is no need to cut it down it will just be a little more gathered. Now measure from where you want the waistband to sit and where you want the fabric to end on your leg for example the right above the knee. From that number subtract 2 inches. This will be the length of fabric you want for your main fabric. Your band fabric will be 5 inches by the width of the fabric (usually 44 inches). Obviously this will have a different look for adults and children but I like how it looks on each and you can definitely do math to adjust your band with (taking a few inches from one fabric and adding it to the other). For your elastic you want to measure around your waist and make it a so it has to stretch. I usually subtract 4 inches from my waist measurement.
For these skirts I like to use quilting cotton for beginners but if you’re comfortable with sewing it will work with any fabric you want. Whether I make this skirt for an adult or a child I always use the full width of the fabric for quilting cotton usually 44 inches. If the width of your fabric is longer there is no need to cut it down it will just be a little more gathered. Now measure from where you want the waistband to sit and where you want the fabric to end on your leg for example the right above the knee. From that number subtract 2 inches. This will be the length of fabric you want for your main fabric. Your band fabric will be 5 inches by the width of the fabric (usually 44 inches). Obviously this will have a different look for adults and children but I like how it looks on each and you can definitely do math to adjust your band with (taking a few inches from one fabric and adding it to the other). For your elastic you want to measure around your waist and make it a so it has to stretch. I usually subtract 4 inches from my waist measurement.
Love this recipe?Follow @RaeGunRamblings or tag #RaeGunRamblings!