20 Minute Snack Bag Tutorial
Ingredients
- Bag Fabric 8 X 20 inches
- Top Band Fabric 3 X 18 inches
- Ribbon 30 inches
- Safety Pin
- Iron-on Vinyl words optional
Instructions
- Fold your bag fabric right sides together so you have an 8 X 10 rectangle. Sew or serge down both long sides. Turn right side out.
- Iron the band fabric in half width wise so it’s even skinnier. Then fold it in half lengthwise and align it over the bag piece.
- With the raw edges (not the folded edge) touching the raw edge of the bag tuck the end of the band under and pin to the outside edge of the bag as shown above. You should have the band pinned all the way around with the two ends tucked under so it looks pretty.
- Next sew around the top catching both the bag and all the layers of the band fabric.
- Flip the band up and top stitch along the bag edge making sure to catch the band fabric on the inside to secure it down.
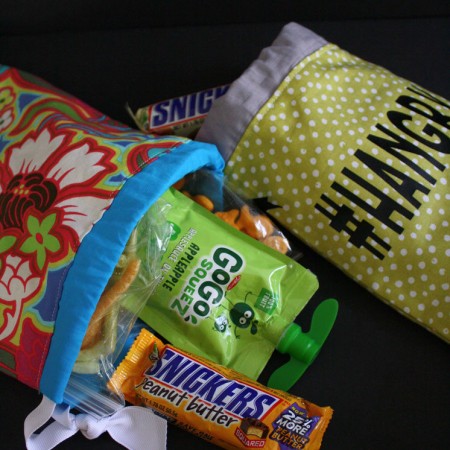
- If you want to add some vinyl letters like my #HANGRY do so now. I used my Cricut explore to cut out iron-on vinyl. If you’ve never done that it’s really fun and easy. I have a whole post that will walk you through how to use iron-on vinyl.
- Finally thread your ribbon through the casing using a safety pin to help push the ribbon through, tie a knot and you’re good to go!
Love this recipe?Follow @RaeGunRamblings or tag #RaeGunRamblings!