30 Minute Shower Curtain Tutorial
Sewing a shower curtain like this is REALLY EASY. If you are a beginner this is a great project for you. The most difficult part will be the measuring and planning how much fabric to use.
Supplies
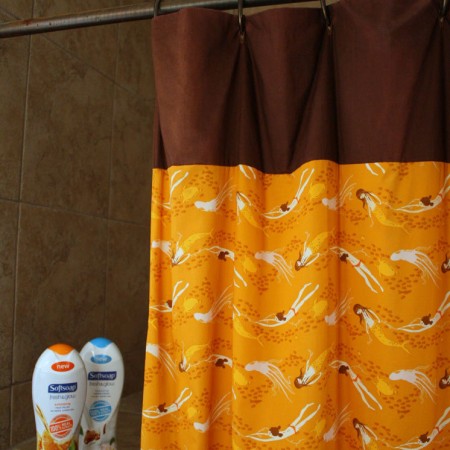
- 2 pieces Brown fabric 16 X 36 inches
- 2 pieces Mermaid fabric 73.5 x 36 inches
Instructions
- It looks like a lot of steps but really you’re just sewing the two fabrics together, sewing a bunch of button holes along the top, and then hemming the bottom and the sides!
- First make your fabric the right size. With right sides together sew your top pieces of fabric together along the short sides so you have one long piece of fabric using a 1/2 seam allowance (mine was 16 x 71).
- Sew your bottom fabric right sides together along the long edge with a 1/2 seam allowance. At this point I had a mermaid piece that was 73.5 x 71 inches
- Finish the seams with a serger or using a zig zag stitch to keep it from unraveling if you wash it or if you have particularly finicky fabric (you can skip this step if you want it to be even faster).
- Iron your top fabric in half WRONG sides together. So the pretty side of your fabric is facing out. With mine I now had a folded piece that was 8 x 71 inches.
- Serge or sew the two unfinished edges at the same time to the right side of the top edge of the bottom fabric. Finish the edge if desired. When you lift up the top edge you should have a shower curtain just without the holes for the curtain loops.
- Finally put in the holes for your curtain loops. Count how many curtain loops you have and then 1 inch from the folded top edge of you curtain mark spots to make your buttonholes. You can do math but I thought it was easier just to fold the curtain. If you are a perfectionist get your ruler out.
- Sew and cut a button hole going vertically for each spot you want a curtain loop. If you don’t know how to sew a button hole just check out youtube or your machine manual it’s really a lot easier than most people think. I will try and post a tutorial for one soon. But I know google can help you out right now if you don’t want to wait for me ;)
- Now go hang your curtain (yes I know it’s not done) you don’t have to put it on all the loops. You just want to be able to figure out the right length for the hem and make sure nothing looks off with the width. Pin your the bottom edge up so it’s your desired length. Remove it from the bathroom and then sew the hem.
- Finally fold under both sides by 1/2 inch and hem them you’re good to go!
Notes
Start by measuring the width that your shower curtain will need to cover. To that add 1 inch. This will be your width measurement. Mine is 70 inches (which includes a few extra inches on each side so when it’s fully stretched out it touches both walls with a little overlap). So my width measurement is 71.
If you want your curtain to have an accent panel like mine decide how tall you want your panel. Then double it and add 1 inch. Mine is 7.5 inches. So my panel fabric should be 16 inches by 71 inches.
Next measure how tall your shower curtain should be so from your curtain rod to where you want it to hit. I like might to be barely not touching the floor. This will be your height measurement. Mine was 75 inches. But since we’re using the panel subtract the finished panel height (for me 7.5) so for me that means 75-7.5 = 67.5 and now add 6 inches for the hem and seam allowance so that puts me at 73.5.
So if you’re curtain is to be exactly the same as mine you’d need: Brown fabric 16 X 71 inches
Mermaid fabric 73.5 x 71 inches
Most fabric does not come in that big of pieces. So I had to piece together something big enough. I decided to put the seam right down the middle and it looks fine. But you’ll want to add a seam allowance so add in another inch to your width measurement.
Love this recipe?Follow @RaeGunRamblings or tag #RaeGunRamblings!