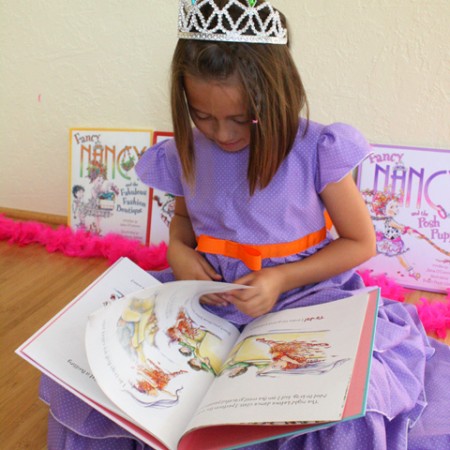
FANCY NANCY DRESS INSTRUCTIONS
DIY Fancy Nancy dress tutorial. Full instructions with how to make a pattern and detailed steps - Rae Gun Ramblings
Supplies
- Purple Polkadot Fabric I got mine from Joann’s I think I used about 4 yards for T’s dress and she is 6 years old
- 1/4 inch elastic 2 yards ish
- Orange 1 inch ribbon 2 yards ish
- A basic bodice pattern you like I used Very Shannon’s Sweetheart Dress pattern which I’ve already raved about, it has a great fit, I didn’t follow the instructions I just used the pattern pieces. Before I discovered that pattern I used just a basic simplicity pattern with a slightly higher waistline.
- A basic poofy sleeve pattern
- Ruler
- Disappearing Fabric Marker
Instructions
Cut Your Pieces
- 2 front bodice pieces cut on the fold
- 2 back bodice pieces where you add 2 inches between the fold and where the straight edge of the pattern starts.
- 2 sleeve pieces instead of cutting a regular sleeve you want a flutter sleeve see how I have the pattern piece hanging off the edge in the picture above.
- 10 ish strips of fabric 6×44 (or whatever the width of the fabric is) you may need more or less depending on the fullness and size of your skirt.
- We will cut the base skirt pattern later.
SEWING THE FANCY NANCY BODICE
- Sew the bodice front to the bodice back at the shoulders. Repeat with second set of pieces (this will be the lining)
- With right sides together sew around the neckhole.
- Flip right side out and iron.
- Using a fabric marker and a ruler draw vertical lines on the back piece that hit about where the back neck starts curving. For mine I found the center and each line was 4 inches from the center.
- Draw a horizontal line 1 inch from the bottom and then 2 inches above that until you run out of room (it doesn’t have to be 2 inches that’s just what I did)
- Then go to your sewing machine and set it on a basic zig zag stitch. Sew the elastic in while pulling it as tight as it will go remembering to back stitch extra good at the beginning and end. I like to do a line right below the neckline and then start on my mark lines.
- Finish the straight edge of the sleeve. I use a serger and do a rolled edge but you could easily just hem it.
- Gather the rounded part of each sleeve.
- With right sides together sew the sleeve onto the armhole (you want the gathered part to go to the rounded edge of the bodice). Repeat on the other side.
- With right sides together sew the side seam.
- Turn right side out
SEWING THE FANCY NANCY SKIRT
- You will first want to cut your skirt. Measure how long you want your skirt to go past the bodice. Fold your fabric in half (how it was from the store lengthwise)
- Take the measurement from step one and cut your fabric that long. You want two pieces like this.
- Open your bodice and then fold your finished bodice in half so that the front piece and the back piece is folded. Line the front section up with the fabric it to one side of the fabric. You are trying to see how wide the skirt needs to be to attach to the bodice. Add one inch to that that and cut a diagonal line from there to the bottom of the fabric.
- Repeat with the other piece of fabric and the back side of the bodice making sure to stretch the elastic in the bodice a bit.
- Now take your measurement and measure from the sides and trim the bottom of the skirt so it’s rounded and the length will be the same ll the way around.
- Tear or cut your strips for the ruffles.
- Sew them right sides together short end to short end to make one long ruffle.
- Finish one edge. I used a rolled hem on my serger.
- Then gather the other side. I did this on my serger so that edge is finished too. If you don’t have a serger you might want to overlock the whole thing before gathering (yeah I know a big pain).
- Now pin your ruffles in place starting at the top. When you get to the edge cut the ruffle try to handle it gently so as not to unravel the gathers.
- Then aline the next ruffle under about 1/2 to 1 inch under the ruffle above. Repeat until the skirt is full of ruffles. I leave the base as the bottom ruffle.
- Sew the ruffles down.
- Then sew the side seams together.
- Next attach the bodice to the skirt by sewing the bottom bodice edge to the top skirt edge matching side seams and stretching the back top a little to make it fit. If the side seams aren’t exact you can either go in and take more in or just not have them be perfect. There will be the ribbon so it won’t be super obvious.
FINISHING THE FANCY NANCY DRESS
- Cut your ribbon so it’s long enough to go around the dress and tie in a bow.
- Find the middle and then pin to the center front of the dress on the seam holding the bodice and the skirt together.
- Wrap the ribbon around ans start from the edge of the elastic and top stitch the ribbon down at both edges.
- Make the bow by creating a loop as show above and pinning. Then take another piece of ribbon and wrap it around the middle of your loop and pin so that it holds the bow shape.
- pin to the center of the ribbon in the front an sew down both sides of the middle loop piece.
- Measure or try it on your kiddo and finish the bottom hem. I did this with a rolled edge.
Notes
To make the bodice you need the 4 bodice pieces, the two sleeve pieces and the elastic. I finish all my seams with a serger but I’m not going to write that with each step if you don’t have a serger you can use a zig zag or overlock stitch to do that.
Love this recipe?Follow @RaeGunRamblings or tag #RaeGunRamblings!