Mini Cake Bunting Tutorial
An easy bunting tutorial that will look darling atop a cake for a birthday or other celebration. Plus a simple transportation trick.
Ingredients
- Colored paper
- scissors
- printer
- sewing machine
- skewers
Instructions
- First to make the bunting figure out if you want a patter for your letters/colors and print out your letters.
- Next I like to draw a top line. This will be the top edge of each flag.
- I’ve said many times before I am not a perfectionist so from here I just cut points. I liked that each flag was a little different but if that will bug you by all means measure away.
- After you arrange the flags in order (and triple check it) pull a long take on your sewing machine. You can always cut it shorter.
- Then just start sewing. You don’t need to change your presser foot, needle or anything but if you sew a lot on paper it may dull your needle so you might want to change it when you go back to sewing fabric (I did not).
- Just sew and add the next flag being mindful of spacing.
- At the end leave a long tail.
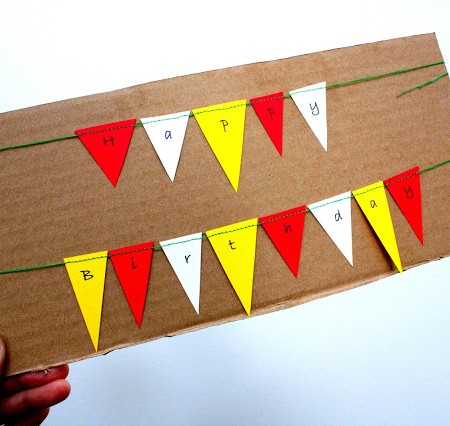
- If you are not going to use the bunting right away I find it super helpful to wrap it around a piece of cardboard and attach a few pieces of tape. So much better than dealing with a tangled mess and trying not to rip paper when you’re dealing with other last minute party details.
- To put it on the cake just stab the cake with some skewers and tape or tie the string on.
Love this recipe?Follow @RaeGunRamblings or tag #RaeGunRamblings!