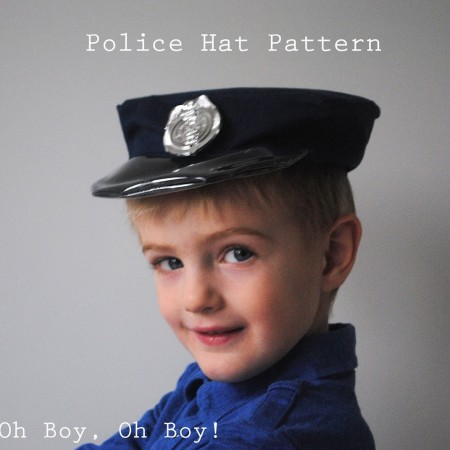
Handmade Halloween Police Hat
Grab a blue button down shirt and blue pants, a few dollar store accessories and all you have to make is the hat. Here’s how
Supplies
- 1/2 yd. navy blue quilting cotton + scrap of black for brim optional
- scrap of clear vinyl
- scrap of heavy weight interfacing
- coordinating thread
- plastic police badge
Instructions
- Print the hat pattern (the large size will fit 5-7 yrs, the small size fits 2T-4T). Tape pattern pieces where indicated.
- Cut your pattern pieces, making sure to lay your material on the fold when indicated. Use a 1/2″ seam allowance unless otherwise indicated.
- Fold the headband in half, short raw edges (right sides together). Sew along the short raw edge to form a loop. Repeat for the other headband piece.
- Pin the lining headband and lining crown pieces together (right sides together) lining up the headband seam with the back of the hat. Sew.
- Repeat for the main fabric pieces. Press the seam toward the band and top stitch along the top.
- With right sides together, sew the navy blue brim pieces together along the outer edge.
- Clip the curve and turn right side out. Repeat for the clear vinyl pieces making sure to lay a piece of tissue paper or stabilizer between the vinyl and needle.
- Insert the navy blue brim inside the clear vinyl brim and pin the brim to the right side or the outer hat, opposite the seam in the back. Sew the brim to the headband.
- Place the lining hat inside the outer hat, right sides together. Make sure the brim is turned so it is sandwiched between the layers.
- Pin and sew around the raw edges of the head bands, leaving a 2 to 3 inch space, hear the brim, for turning.
- Before turning: Try hat on your child. If the hat is big follow the next step. If not skip ahead.
- Cut a piece of elastic. Small size: 2 1/2 ” piece of 1/2 wide elastic Large size: 3 ” piece of 1/2 wide elastic.
- Pin elastic onto the seam allowance at the bottom of the hat straddling the back seam. Using a zig zag stitch sew the elastic stretching as you sew and back stitching on each end. Make sure you only sew on the seam allowance, otherwise it will cause problems for turning.
- Turn the hat right side out. Press all seams, turning the open ends in toward each other. Pin the opening and then top stitch all the way around the bottom of the hat band. Stretch the elastic as you sew.
- Glue or sew the police badge to the front.
Love this recipe?Follow @RaeGunRamblings or tag #RaeGunRamblings!