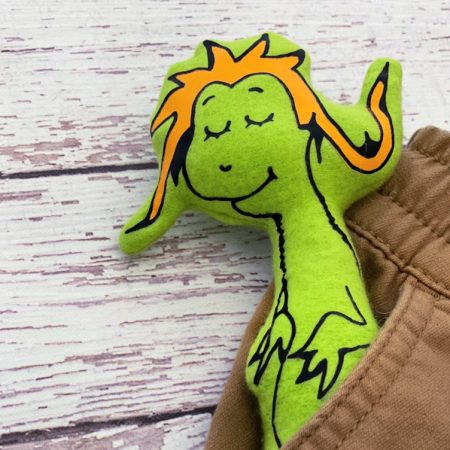
Wocket in my Pocket Doll
How to make a Dr. Seuss inspired Wocket in my Pocket pillow style stuffed animal.
Supplies
- Fabric. I used felt but if you have fleece or flannel on hand or can't find the right color in felt fleece and flannel will work great too and may even be a little easier to turn right side out.
- Heat Transfer Vinyl. Also called iron-on vinyl this kind o vinyl can be cut with cutting machines like the Cricut and then ironed onto fabric.
- Cutting Machine. The easiest way to do this is to use a cutting machine like the Cricut Maker or Cricut Explore but you could use an exact knife and a steady hand if you don't have access to one of those. But check your local library, a friend recently told me her library let's them use the Cricut cutters there.
- Sewing Machine. You could hand sew as well but this is great for learning how to use a sewing machine.
- Thread. Whatever thread you have on hand should work. If you're buying it new I usually use 100% polyester for most of my sewing.
- Iron. You'll want a nice hot iron or a heat press machine to transfer the vinyl onto the fabric.
- Batting. Any kind of loose stuffing will do the job. If this is your first stuffing project just be aware that it takes more stuffing than you'd imaging to fill a small doll. I'd say about three times the size of what you want the finished piece to be will be amount it will take once compressed.
- Pins. If you're a seasoned sewer you can probably skip these but if you're learning how to sew or doing a complicated design like this Wocket straight pins will come in handy.
- Wocket or other design Template. I have my Wocket design that my husband so kindly drew for me available for free to my mailing list subscribers (it's free to sign up) or you can purchase it here in my Etsy shop if you don't want to deal with email. If you're using a different design you'll want to stick to something basic. Look for images ladled outline, svg, stencil, or even coloring page. Remember you can always cut different parts out of different color vinyl.
- Loop Turner optional. If you have a loop turner it can be really handy to help flip your project right side out. Alternatively you can use your fingers, a safety pin or even a chopstick to help get the item turned.
- Hand sewing needle. Any basic needle will do. I like embroidery needles since they are larger and easy to handle.
Instructions
- Cut vinyl. Start by cutting the vinyl.
- Iron on vinyl. Iron on the vinyl. If you are using multiple colors you need to do them in layers.
- Cut fabric. Once fabric is fully decorated you want to cut two pieces the same size. I used the outline of the Wocket as my guide make sure to leave at least a 1/2 inch space since you will be sewing.
- Sew fabric. Place the fabric right sides together and sew around using a 1/4 inch seam allowance. Make sure to leave a 2 inch hole so you can flip the doll casing right side out.
- Turn fabric. Use your fingers, safety pin, chopstick or my favorite tool, a loop turner to help turn your doll right side out. Here's a whole tutorial on how to easily turn things right side out.
- Stuff fabric. Shove the batting in to fill the stuffy.
- Close up doll. Hand stitch the doll closed.
Love this recipe?Follow @RaeGunRamblings or tag #RaeGunRamblings!