Free DIY Bunny Softie Pattern
Free easy and adorable diy bunny softie pattern. great sewing project made with the Cricut maker machine and fun bonus halloween costume.
Ingredients
- Bunny Fabric
- Ear Contrast Fabric
- Embroidery Thread
- Dress Fabric
- Dress Contrast Fabric
- Batting
- Heat-n-bond
- heat transfer vinyl if making the pumpkin dress also on amazon
- Cricut Washable Marker also on amazon
- Cricut Maker also on amazon
Instructions
How to Sew the Bunny Softie
- Iron the ear contrast fabric and nose fabric to heat-n-bond.
- Cut and mark your pattern pieces using the Cricut Maker.
- Embroider the face and sew on the nose (I totally forgot to sew on the nose so I cut one out of iron-on vinyl and iron-ing it on OOPS! hahah)
- With right sides together sew the limbs together, clip the curves and turn right side out.
- With right sides together sew the head pieces to the body pieces at the neck.
- With right sides together sew the one back ear piece to a front ear piece. Clip curves and turn right side out.
- Stuff the limbs and set aside.
- Fold a pleat into the ears and pin to the top of the head piece. Roll the length of the ears.
- Pin the arms and legs in place and pin to the center of the body so you will have room to sew around the edge. Position the back body piece over sandwiching the ears and limbs.
- Start at the bottom and attach one leg and sew around leaving a gap between the legs to turn and stuff.
- Click any curs and points. Turn right side out and stuff.
- Hand stitch the hole closed.
How to Sew the Dress and Pumpkin Costume
- If using a pocket position right sides together and sew around the edges leaving a small gap in the straight edge for turning.
- Clip around the edges and turn right side out.
- Iron and topstitch along the top edge to close the hole.
- Position on dress and topstitch to the dress piece by sewing along the curved edges.
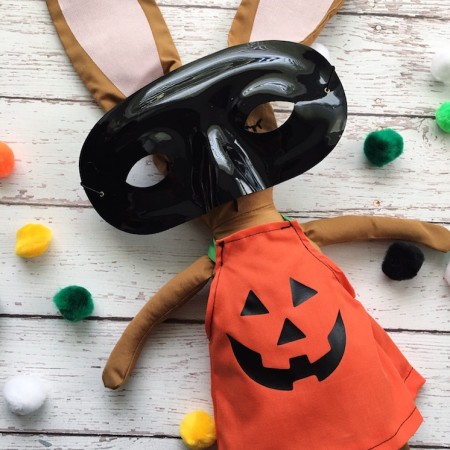
- If making the costume cut the Jack-o-lantern face out of black iron-on vinyl and iron to the dress I used my Cricut EasyPress
- Fold straps in half and sew down the long side. Turn right side out.
- With right sides together sew the side seams of the dress.
- Fold under the armhole edge and sew under.
- Do the same for the neckline and hem.
- Attach the straps to the side of the dress (not the top like pictured below oops) and you’re good to go!
Notes
This is one of the free projects that can be accessed for free with the Cricut Maker. I was able to cut all the fabric pieces on the machine and marked all the embroidery with the fabric pen in the machine.
Love this recipe?Follow @RaeGunRamblings or tag #RaeGunRamblings!