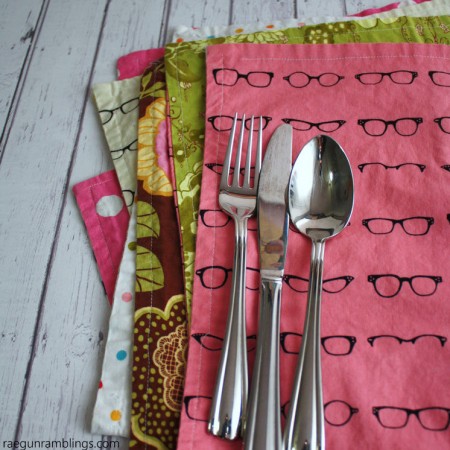
15 Minute Reversible Placemats Tutorial
This 15 minute reversible placemats tutorial is so easy my elementary aged nieces made the ones pictured here! Great beginner sewing project.
Supplies
- Front Fabric 18 x 15 inches I just use quilting cotton
- Back Fabric 18 x 15 inches
- Loop Turner optional
- Pins sewing machine, thread, scissors, iron, all that basic stuff
Instructions
- Start by cutting all your fabric pieces to the right size. Keep in mind that placemats don’t have to be perfect you can do bigger or smaller if that works better for you (or your fabric stash) but the two pieces that will make up one placemat DO need to be the same size.
- Next decide which pieces of fabric will go together (the nieces loved doing this).
- Then with right sides (the pretty size) together pin around the edges with the pins going in perpendicular to the edge and the head of the pin on the outside.
- Starting at the middle of any side (so NOT at a corner) sew with a 1/2 inch seam allowance (that is the space from the needle to the edge of your fabric) and leaving a 2 inch space between where you start sewing and stop sewing. To do this sew around and when you get 1/2 inch from the corner use your hand wheel and turn it so the need is down then lift your presser foot and turn your fabric so you are on the next edge of the fabric.
- Clip your corners. Basically cut your corners off (this will help you get a nice point when you turn your placemat right side out). Make sure to cut close to but NOT over the sewing line.
- Next turn your fabric right side out. You can reach in and grab it or use a loop turner to help. The loop turner is SUPER cool but does take practice to get the hang of it. If you are a newbie that might be an unnecessary frustration but if you feel confident I encourage you to learn how to use one it will make so many things in your sewing life easier (see my video on how it works here).
- Make sure the corners are pushed out from the inside (I use a loop turner but you can use a pencil) and iron making sure the fabric is folded under at the opening through which you turned the placemat.
- Now topstitch around the edge of the placemat with a 1/4 to 1/2 seam allowance (I like the look of a smaller one but that can be harder for new sew-ers). This time sew all the way around and over where you started sewing this will close up the whole and also reinforce that initial sewing place.
- Make something delicious and eat it upon you new fancy placemat.
Notes
I’m writing this for one but obviously multiply it by however many placemats you want! And a speed tip from a girl who sews a whole lot of the same thing over and over (ahem for my shop), cut all your pieces out at once and do the same step for all of them at the same time (as opposed to making one placemat completely and then starting another). Alternatively for motivation you might want to do one full one first or just a few so that you (or your sewing minions can feel successful and excited to keep going).
Love this recipe?Follow @RaeGunRamblings or tag #RaeGunRamblings!