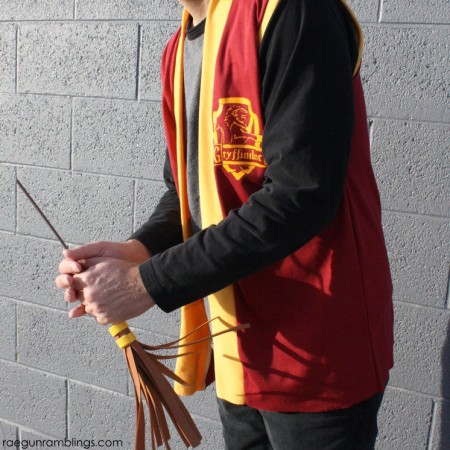
Harry Potter Quidditch Jersey
Easy 1 hour DIY project for comic con or Halloween! Make a fun Harry Potter Quidditch Jersey Tutorial
Supplies
- Loose fitting shirt for your pattern
- Large paper for tracing your pattern kid drawing paper or even tissue paper works well
- Knit Fabric maroon and goldenrod unless you want to do one of the other Hogwarts Houses make your pattern first and then you can see how much you need
- Iron-on Vinyl
- Cutting Machine like a Cricut Explore
Instructions
Start by making your pattern:
- I used one of Daniel’s T-shirts (men’s Large from Old Navy) and the jersey works great for him and for me. After all it’s a loose vest thing it doesn’t have to fit perfectly. Fold it in half. Trace the basic shape of the bodice (not including the sleeves.
- Instead of doing a curve for the neck I just angled the line down from the shoulder.
- Cut out your pattern 1/2 inch outside your tracing line so that you have a 1/2 inch seam allowance.
- Now cut out your main color fabric (maroon).
Sew your jersey together:
- With a 1/2 inch seam allowance sew your shoulder seams together.
- Then sew down your side seams. I used a serger but you can just sew it on a sewing machine. Since you’re using a knit you don’t have to worry about finishing your seams.
Next cut out your accent fabric (goldenrod):
- You want 5 inch strips the width of the fabric for the front band and 2 inch strips for the armhole bands.
- Lay it along the front edge of your jersey you just sewed.
- You might need to sew two strips together to make it long enough if so do that. Cut a length the right side for the front.
- Next lay it around the armhole and cut to the right size. Make a tube for each armhole by sewing the short ends together. Repeat for the other side.
- Iron each piece in half and then sew (or serge) to the jersey.
- You should now have the basic jersey made. All that is left is decorating it.
Make your iron-ons:
- If you’ve never used heat transfer vinyl it’s one of my FAVORITE craft supplies you can learn more with my How to use Iron-on Vinyl post but for now I’ll just assume you know how to use it.
- I just searched for an emblem I liked and then typed out what I wanted it to say on the back, cut it out of my vinyl and then ironed it on.
Love this recipe?Follow @RaeGunRamblings or tag #RaeGunRamblings!