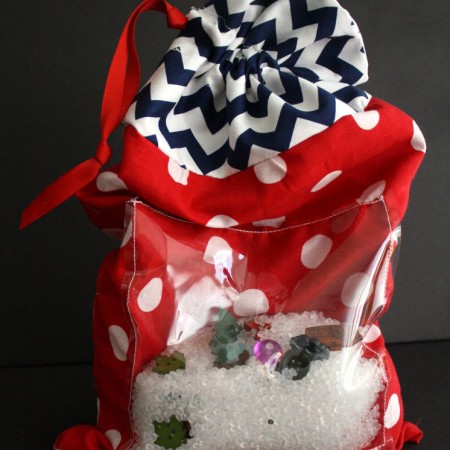
I Spy Activity Bag Tutorial
This I spy activity bag tutorial is great. Perfect for fighting the kids cries of boredom during summer break.
Supplies
- Bottom Fabric 2 pieces 10×22 inches
- Top Fabric 2 pieces 6 x22 inches
- Ribbon 20 inches long
- Clear Vinyl 6×6 inches
- Safety Pin
- Clear Beads like Poly Pellets
- I Spy trinkets I like various buttons but you can use anything
- Washi Tape or any tape
Instructions
- Start by folding the bottom pieces in half and then position the vinyl square on the center of one side (the fold should be to the bottom).
- Sew the vinyl square around 3 sides attaching it to the fabric. I like to use washi tape to help keep the vinyl in place while I sew.
- Fill will beads and trinkets.
- Sew the final side closed.
- With right sides together sew down the two sides of each bottom piece. The fold should be at the bottom and there should be an opening at the top.
- Turn the piece with the I Spy Patch right side out and slide the other piece into it.
- Now with right sides together sew one long edge of the top fabrics together.
- Turn right side out and iron. Fold in half lengthwise and arrange above the bottom pieces. Cut off any excess fabric leaving just about 1/2 an inch past the bottom (this is for your seam allowance.
- Open up the top fabric match the seam line and on each side mark a 1 inch pace in the middle. Sew to that space making sure to back stitch at both ends and then past it over the seam and to your other mark. And then down the end. This is so there will be a hole to put your ribbon through.
- Press the seam open and fold in half.
- You should see a little hole.
- Sew a line joining both fabrics above and below the hole.
- Now with the raw edges of all the fabrics touching sew together. Make sure that the top fabric is on top of the right side of the bottom fabric. Finish the edge with a serger or zig zag stitch.
- Flip the top part up and you should have a bag.
- Finally thread the ribbon through the casing and knot and you are good to go!
Love this recipe?Follow @RaeGunRamblings or tag #RaeGunRamblings!