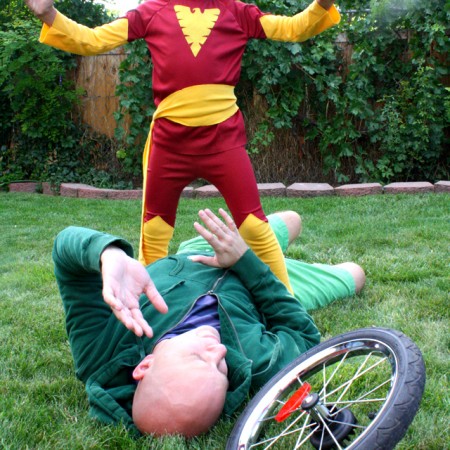
DARK PHOENIX COSTUME TUTORIAL
DIY Dark Phoenix Costume Tutorial and recreation of Dark Phoenix verses Professor X comic
Supplies
- Red and Yellow Knit
- Yellow Cotton piece for emblem
- Heatbond for emblem
- Long sleeve shirt pattern
- Basic Elastic Waist Pants Pattern
Instructions
- Cut your bodice piece of your shirt pattern out of red fabric.
- Mark on your sleeve pattern where the gold should be angled. Cut the gold fabric. Cut the maroon fabric so that it is straight across and will extend under the gold fabric.
- Lay the gold on top of the maroon. Pin and top stitch along the gold edge to attach the gold to the maroon and form one long sleeve piece.
- Continue to assemble the shirt like normal.
- Lay the pant pattern out and mark where you want the gold to be for the the “boots” look.
- Cut out and sew together like you did for the sleeve pieces.
- Continue to assemble the pants like normal.
- Cut a long sash out of gold (mine is just a long strip.
- Make the emblem but making some iron-on fabric. To do this iron some heatbond to the back of plain cotton yellow fabric.
- Then I used my Cricut by downloading a Phoenix emblem and cut it with the fabric side up positioned on my cutting mat. If you don’t have a cutting machine you can do this step easily by tracing on the paper side of your iron-on fabric and cutting with scissors.
- Peel the paper off the back and position on the center of your shirt and iron down.
- Top stitch around the edge of the emblem.
Love this recipe?Follow @RaeGunRamblings or tag #RaeGunRamblings!