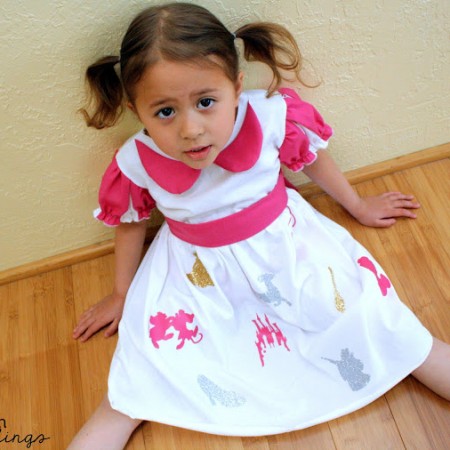
Cinderella Dress Tutorial
Turn a 3XL white shirt into a little girl's Disney themed dress.
Ingredients
- 3 XL shirt a regular XL would probably have worked, I think the 3XL could get up to a size 6 or so
- 1/2 yard Colored fabric
- Iron-On Vinyl in coordinating colors
Instructions
- To start off I first cut a skirt piece from the T-shirt. I cut a straight line from the shirt and voila. Then I cut along the sleeve seams and opened the shirt up flat. I folded the front down the middle and used a trusty bodice pattern and cut the front piece then repeated with the back and the back bodice piece. I cut both on the fold. Since the T-shirt is stretchy it will just slip over her head. Then I cut 2 sleeve pieces (I just used a poofy sleeve from a random pattern) from the color and the shirt (on the sleeve part). And for the sash I cut a 5 inch strip the length of the fabric (so it was 44″ X 5″).
- Next I put in an inset Peter Pan collar on the front bodice piece. I didn’t have a patter for this so I made one. I free handed a shape that I thought looked like the right size and then cut 4 out with a generous seam allowance. Then I sewed the outside of the curve and snipped to the sewing line to help it lay flat. Next I ironed it. Then I cut along the collar about 1 inch from the edge and pinned my collar pieces. Then I sewed back on the piece of the bodice I cut off so the collar was sandwiched between the white pieces. Finally I understitched the seam down (i.e. folded the seam towards the bottom edge and then sewed along the top (under the collar)). Now the front bodice piece is done.
- Start by sewing the shoulder seams of the bodice from to the bodice back (right sides together). To make the sleeves see my princess sleeve tutorial. But really fast I slit the sleeve pieces sewed them together, and then sewed them to the shirt. Next gather up the skirt. I used my favorite gathering techinique but you can do it however you want. Then attach the bodice to the skirt by sewing them right sides together. And the dress is done. To make the sash fold the strip in half length-wise and see. After you right side out that strip tuck the edges in and sew. And you’re done with the basic shape.
- Now comes the fun part. Play around on Cricut Craft Room or flip through your cartridge books and find designs you want to use. All of mine came from the Disney Happily Ever After Cartridge. Cut the vinyl out. Remember to mirror flip your images before you start cutting! Then just weed the design and iron it on. If you’ve never used iron on vinyl before see my vinyl tutorial.
Love this recipe?Follow @RaeGunRamblings or tag #RaeGunRamblings!