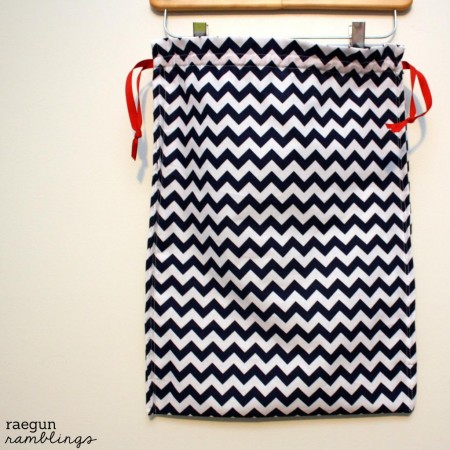
Make Your Own Simple Drawstring Tote
Learn how to make an basic bag with this simple drawstring tote tutorial. Great for beginners.
Supplies
Basic Bag
- Fabric I used a piece of fabric 15X40 inches
- 2 pieces of ribbon 1 yard each
Burlap Patch
- 1 piece burlap
- freezer paper
- fabric paint
Instructions
- If you want to have a patch like mine prepare the patch first. I made myself a stencil on my Cricut and used fabric paint to create my design. I used designs from the “A Child’s Year” collection if you want to do one like mine. If you don’t want to do a patch I actually like the plain look a lot or an outside pocket would be really cute too.
- I pulled some of the vertical threads from the burlap to get the fringed look on the ends.
- After your patch is done fold your main fabric in half lengthwise this will be the front of your bag.
- Pin the patch to one layer of the fabric (make sure that the fold is below the patch so it ends up being right side up) and sew it onto your main fabric.
- Finish all four edges of the fabric so it does not unravel. I serged mine but you can do a zig zag stitch or use pinking sheers too.
- Then finish both long edges by rolling the edge under and stitching.
- Next make the casing. Fold over one of the short edges about 2 inches and sew near the bottom edge. Then sew a line parallel to that (a little wider than your ribbon). It should look like the picture to the left.
- Do this to both short edges.
- Then fold the fabric in half (fold positioned downward) with the right sides out so it looks like the finished bag.
- Starting at the lower line of stitching sew straight down parallel to the long edge. Do to both sides. (right bottom picture above)
- Now you should have something that looks like a pillow case with two flaps with a casing along the two flaps.
- Seal your ribbon by running the ends over a flame.
- Next string the ribbon into the casing (the middle space you created in the top flap). One side of the string should go in each side with the ribbon middle/fold of the ribbon on one side and the tales of the ribbon on the other.
- Do this with the other piece of ribbon so that it’s tales are on the opposed side.
- Tie knots. If you pull on the strings you’ll be able to cinch you’re bag. And you’re done. You just made a drawstring bag.
Love this recipe?Follow @RaeGunRamblings or tag #RaeGunRamblings!