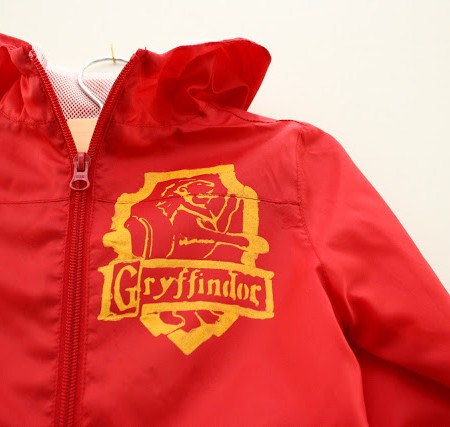
Gryffindor Jacket Tutorial
Turn a plain jacket into a Gryffindor house jacket with an easy freezer paper stencil tutorial.
Supplies
Instructions
- I used this Gryffindor Crest Stencil Image by Jennifer over at Sew Hooked and cut it out on my cricut. If you don’t have a cutting machine you could also just print the picture onto the back of the freezer paper and cut it out with an exacto knife. You want the shinny side to face down when you cut it out.
- Then after testing the iron heat on an inconspicuous part of the jacket I carefully ironed it on shinny side down. This was by far the most detailed stencil I have cut out. I ALWAYS cut out multiples since the cutting machines can be finicky. I fit two on a sheet and the second one came out great. I just used my embroidery scissors to clean it up in a few places before ironing it on. To me this is the most important step so take time to make sure all the edges are securely down.
- Put a piece of cardboard or a piece of freezer paper shinny side up in between the layers of the fabric. This is just to protect the back if the paint leaks through. Next I used fabric paint and a sponge brush to fill in the stencil. My favorite paint is Tulip’s soft fabric paint. Michael’s craft store carries a great selection of colors and different bottle sizes. Even glitter like I used on my nieces’ Hunger Games Shirts.
- I find it works best to put a blob on my brush and then blot it around. I definitely have had better luck blotting as opposed to brushing and smearing the paint. And I just repeat until it looks like there is a good even layer.
- Then let it sit to dry. I like to pull of the freezer paper while the paint is still tacking because if it dries completely you run the risk of peeling off extra chunks but at the same time pulling it off while it’s wet can be tricky with little pieces and since you’re more likely to smudge the image with your hand or the paper as your removing it. I peel carefully from the edge and sometimes use a pin holding the point to the garment and pulling the paper with my other hand (basically keeping the fabric still while pulling the paper off but I feel like I have more control if I use a pin. I usually wait 1 to 2 hours. if there are small pieces (the insides of “A”s) I use a pin to try to lift them off but if I’m nervous about smearing the paint I wait until it’s completely dry.
- Now since this fabric was like that parachute fabric stuff I was able to remove some of the imperfections with a q-tip and some nail polish remover. Do not try this with any knits. And make sure to test the nail polish remover on an inconspicuous spot on the garment first. This is the messiest a stencil has turned out for me. I had a bit of trouble ironing it and I’ve never used this kind of fabric before so even though it was a little messy the design was curvy enough that I think it still looked good.
Love this recipe?Follow @RaeGunRamblings or tag #RaeGunRamblings!