Baby Taggie Blanket Tutorial
This is a quick and easy project and would be great for one of those last minute baby showers.
Supplies
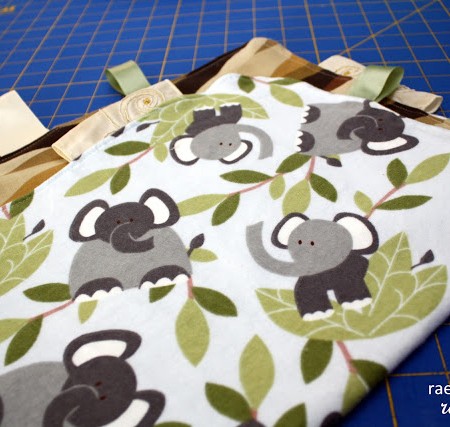
- Fabric one piece for the front or back. The amount depends on the size of blanket you want. I used pieces that were each 21×21 inches. Any kind of fabric would work but I used flannel for one side and just a regular cotton quilting fabric for the other
- Scraps of ribbon
- Pins
Instructions
- Decide how big you want to make your blanket and cut both pieces of fabric to size. I’ve seen small ones that are 12×12 but I did 21×21 since it was an easy square to make with the fabric I had on hand.
- Then cut and fold your ribbon and position it on the right side of one of your fabric pieces (I used ribbon pieces that ranged from 2-5 inches).
- Pin the other piece of fabric right side down to the first pieces catching the ribbon pieces. The ribbon should now be sandwiched between the right sides of your fabric.
- If you want rounded corners use a bowl to draw the curve on each corner.
- Sew around the edge leaving a whole where you can flip the blanket right side out.
- Iron.
- Top stitch around the blanket closing the hole.
- Look at your adorable taggie blanket you made and feel proud.
Love this recipe?Follow @RaeGunRamblings or tag #RaeGunRamblings!