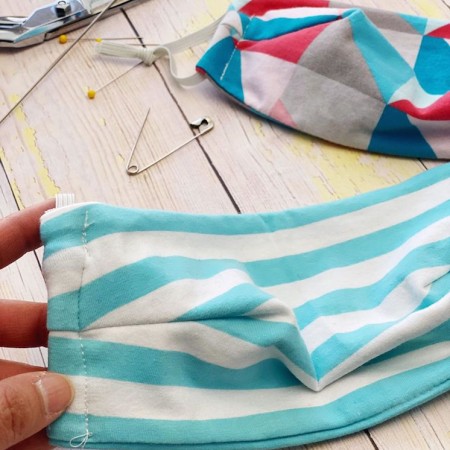
How to Sew a Fabric Face Mask
Supplies
- Fabric
- Elastic or stretchy material
- loop turner bobkin, or a safety pin
- Pattern available in the files section of my FB group or get access via email here optional
Instructions
- Get access to the printable pattern emailed to you https://www.raegunramblings.com/mailing-list-sign-up/
- Cut the fabric into two 6X11 inch pieces making sure the stretch goes across the long side of the pieces for an teen or adult size mask
- For a child size mask: cut two 5x9 inch pieces.
- With right sides together sew or serge the top and bottom edges together with a 1/4 inch seam allowance.
- Turn right side out and iron.
- Mark the dark points with a fabric marker or pin. Use the cutting guide you can get my FB group in the files section or if you sign up for my mailing list you will be emailed the link to my downloads and the password to access them.
- To mark without the guide fold the fabric in half length wise then widthwise.
- Then fold one side over again widthwise and mark this will be the point of the dart.
- Mark the other end of the dart half way between the folded edge and the top edges when folded in half.
- You can see me doing the marking in the video it sounds more confusing to type out but makes sense if you watch.
- Sew the darts. Make sure to backstitch to keep them nice and secure.
- Fold the darts down.
- Fold the side ends of the mask over 1/2 inch and sew in place with a 1/8 seam allowance. If using woven fabric do this step with a zigzag stitch making sure to go over the end edge of the fabric (this will keep it from unraveling. Be sure to backstitch at both ends.
- Thread elastic pieces through the casings you just made. I cut the elastic to 11 inches that allows for a knot that will fit a variety of sizes that can be tied tighter or looser!
- If it is for someone you can fit it to hold the mask to their face and knot the elastic to make a great fit. If it is a gift knot loosely and stop on this step. Have your recipient fit it to themselves after they receive it.
- Once the knot is tied tightly pull the elastic around to hid the knot in the casing.
Video
Notes
- To save time you can cut one 12x11 piece and you'll only have one side to sew in the next step, this is great if you are making a bunch.
- Tie options (if you prefer to have ties over the head instead of ear loops you can make a long tie from fabric, use longer pieces of elastic, or even ribbon).
- To save on elastic you can sew the elastic onto the side of the mask but this isn’t a great option if you are gifting the masks since you want to have a snug fit and this would not be adjustable in the same way that my regular technique is.
- Elastic alternatives: knit fabric made into straps, socks cut tubes cut in rings, nylons cut in rings, office rubber bands, hair rubber bands, all different kinds of unusual elastic (lace, swim, cording, etc.), ace bandages cut lengthwise to make long strips of elastic.
Love this recipe?Follow @RaeGunRamblings or tag #RaeGunRamblings!