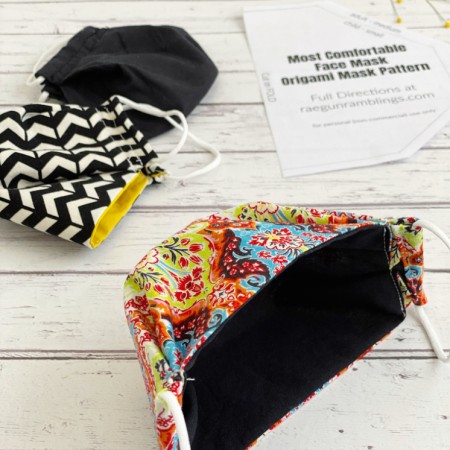
3D Origami Face Mask Tutorial
How to Make an Origami Face Mask
Instructions
- Cut the fabric. You'll need two pieces of fabric they can be the same or different. This pattern is reversible.
- Sewn the fabric together. Sew the fabric right sides together along all edges except the two short sides using a 1/4 seam allowance. Snip the corners and turn right side out and iron flat.
- Fold the top and bottom edges to the center. Fold the top and bottom edges leaving about 1/2 inch space at each edge. The direction you fold it to will be the INSIDE (although it will work fine from either side).
- Make the elastic casing. Fold the ends over 1/4 inch twice. and sew in place. This will leave you with the top and bottom edges folded in, each side folded towards the center and and small triangle of fabric peeking through.
- Sew the top and bottom edges. Fold the bottom flap open in half and pin. Fold the top edge so it is half folded and half hanging over the edge. Take another fold to make two pleats total and pin. The bottom flap gets one pleat/fold the top gets two.
- Test and adjust the fit. I have found for adults this makes a great breathable box. But for my son I need to take the chin part in a bit. I take a small dart in the bottom center of the mask. Doing this makes it so the mask isn't reversible but it fits him SO much better. If I really wanted a reversible mask with a chin dart you could do the dart step as the very first step, before sewing the two pieces of fabric together.
- Add the elastic. Cut the elastic, the length will vary depending on your particular elastic. I find the super stretchy soft stuff 9 inches is good for most adults and 10 inches is good for the braided elastic. And for kids 8 inches and 9 inches respectively. You still need to adjust how tight you tie the knot for the wear. Thread elastic through the casing using a loop turner and tie a knot to fit.
Video
Love this recipe?Follow @RaeGunRamblings or tag #RaeGunRamblings!