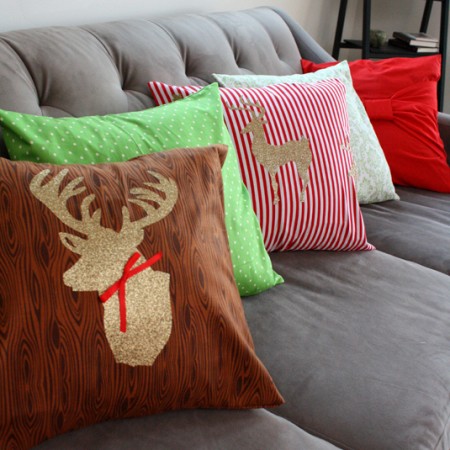
DEER HEAD PILLOW CASE
Christmas Deer Pillow Case Tutorial. Two cute and trendy deer pillow case ideas with full instructions. Great beginning sew-ers project.
Supplies
- Fabric for the pillow case. This tutorial explains how much fabric you’ll need. For my 17″ pillows I used a piece of fabric 17″ by 38″
- Scrap of red ribbon
- Iron on gold glitter vinyl
Instructions
- If you’ve never made a pillow case before it’s a GREAT project for those who are just starting to sew. This literally has 3 seams. Yup you just sew 3 straight lines and you’re done. Check out my step by step tutorial here.
- Now that you have your pillow case. Cut out your deer head. I used the “deer” image from the Teresa Collins Holiday Silhouettes Cricut collection. I did not bother to invert the image since I didn’t care what direction it faced. Then I placed the vinyl plastic side down and scrape with the square flat Cricut tool (my all time favorite tool, not sure how I survived without one) and cut my image. If you’ve never used vinyl before I wrote up a super detailed picture-full how to use iron-on vinyl tutorial that will help you get started.
- Use the tools in the Cricut tool kit to help remove the image. I love the little spatula for this job. And you want to be extra careful with the glitter vinyl since it’s easy to tear it. That’s why I highly recommend using the tools and not just trying to pull it off. If you do tear it you can easily piece it together and the glitter nature of the vinyl should hide the seam as long as you line it up.
- Position the vinyl glitter side up on your pillow case and iron down until affixed.
- Tie a bow out of your ribbon scrap. Flame the ends to keep it from unraveling and then stitch onto your deer’s neck.
- Stuff a pillow form in and you’re good to go!
Love this recipe?Follow @RaeGunRamblings or tag #RaeGunRamblings!