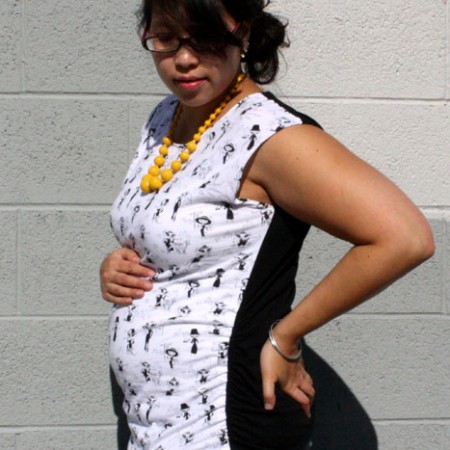
THE CASUAL LADY MATERNITY SHIRT
Quick and Easy Maternity Shirt Tutorial. How to maternity-ize any shirt pattern or even store bought shirts.
Instructions
- On the Casual Lady pattern there is a line to lengthen or shorten the pattern. I added 6 inches. If you’re using a different pattern you’d probably want to lengthen around your natural waist (skinniest part). If you’re starting with a ready made top skip down to step 3.
- Follow the pattern’s instructions so you have a finished top.
- Now try on your shirt and with a disappearing marker mark the side seam around the top of your belly or about the bottom of your ribcage.
- Lay the shirt inside out and mark the same spot on the other side. I just mark one side in step 3 since I want the ruching to be even.
- Cut two pieces of 1/4 inch elastic 9 inches long. The part of the of shirt that I attached it to was about 13 inches. I normally wear M to L shirts if that helps.
- On the inside of the shirt position your elastic one one side of the seam. I decided to do the back since the stitching would be less obvious on the black. I think either side would work. Make sure your seam allowance is out of your way.
- With a zig zag stitch sew down the elastic WHILE STRETCHING it. You want it stretched to right above the hem of the shirt making sure to back stitch at the beginning and the end.
Notes
The Casual Lady shirt pattern comes in both a top and a dress length and it’s really very easy to tweak to make it prego friendly. The way I did it can just as easily be applied to other shirt patterns or even longer store bought shirts.
Love this recipe?Follow @RaeGunRamblings or tag #RaeGunRamblings!